Artichoke-Spinach dip bread?  Uhhhh yes please!

One of my son’s favorite foods is spinach and artichoke dip.  So when I saw this recipe on the Footnetwork show, The Kitchen, I knew I had to make it!  I mean what could be yummier than a delicious spinach and artichoke dip cut into a bread bowl and topped with loads of cheese!!!????   

So if you haven’t watched the show The Kitchen, watch it!  They always have a ton of great recipe ideas.  The show airs on Saturday’s at 11am.  I will be doing another post with a few of their recipes that I plan on trying from their Fresh Fix-in’s episode.  Stay tuned for that!  I’ll be reviewing their White Bean and Smoke Bacon dip, Sunny’s Spicy Tomato Dip and the Mediterranean Shrimp!  Yummy!

Ok now back to the Spinach and Artichoke yumminess!  Yes, this recipe is most definitely sticking!!  If you ever want to make something for a party or just a great sit by the TV snack, this recipe is for you!!!

  
It’s so easy and definitely makes a ton for a huge crowd!!  Here’s a link to the recipe:  Artichoke-Spinach dip bread.

The recipe is a bit messy!  Making the dip is easy.  Stuffing it into the bread?  Well that gets a bit messy.  I mean, I had dip all over my fingers.  Poor me.  I had to lick it all off!   The key is making the slits in the bread to stuff the dip in.  Don’t cut all the way to the bottom of your bread bowl.  I used a spoon to help me slide the dip I between the bread.  It may look like by cutting the bread in the cross hatch that it’d just come out.  But never fear, it stays together.  And then load the top with all the yummy cheese you want.  I’m a self admitted cheese-aholic.  So I confess, I used extra cheese.  But then again, if you haven’t figured that out, well now you know.  Yes, this recipe is seriously sticking!  Try it and let me know what you think!

**************************************************************************

  
2015/04/img_17753.png

Vegan cream of broccoli soup

Now I love the original fat laden Cream of Broccoli recipes too.  But today is the first day of my 21 day eat clean detox.  My husband and I have done several detoxes in the past, but we found one that we absolutely love.  It is on the Whole Living website and is called the 2013 Whole Living Action Plan.  Here is a link to it:  2013 Whole Living Action Plan.  

They have other plans from other years as well, but we liked the recipes best from this year.   The plan basically has you eating only fruits, veggies, nuts, seeds and lentils in the first week.  Sounds hard right?  I thought so too until we tried it!  Their recipes are super yummy and boy did our bodies love it!   You should check it out!  Each week, you add back things like dairy and protein.  It closely matches a vegan diet.  Yes I said vegan!  You can stop cringing.  It really is delicious and super healthy!  Now go look at it.  I’ll wait.

  
Did you look at it???  Good!  So I decided I would follow the plan loosely this time.  The actual plan gives you the recipes and grocery lists for what you need to eat for every meal.  I know right?!?!?  Yes, they make it super easy and fool proof.  But since I’ve done it several times, I know the ingredients we need to stick to, so I am going to modify it a bit.   Since I’ve done several of those recipes in the past, I’ll do a post about the ones that stick and the ones that didn’t in the future.  But back to this post….time to talk broccoli soup.  

The action plan has you eating broccoli soup for lunch on Day 2 and dinner on Days 1 and 3.  Their recipe calls for avocado to thicken your soup.  I love avocado, but for us, it just tastes funky in broccoli soup.  Plus I don’t like my soup too thick.  Don’t get me wrong, it works like magic in making the soup creamy and thick.  But I just wasn’t happy with the taste.  Today I decided to look up some vegan cream of broccoli soups and I found one that looked easy.   It was on a site called Hummusapien.com.  She uses cashew cream to make the soup creamy.  I love cashews!  Let’s do this!!

What’s the end result???  This recipe is definitely sticking in my vegan recipe book!  It gave a such a creamy consistency to my soup and tastes awesome.  Cashew cream is so sweet and creamy and fluffy.  And easy!!  Go figure!  You can use it in place of sour cream in traditional recipes.  But to make it a bit more sour, you should add a touch of apple cider vinegar.  Either way, try it!


Ok I’m not a photographer and it is hard to make anything green look appetizing.  But this is a very delicious soup!  Here’s a link to her recipe:  Vegan Cream of Broccoli.  Her pics are way better for sure!

I didn’t follow her recipe exactly.  I left out the carrots and celery.  I’m not a big fan of a mirapoux to start my broccoli soup.  I also added nutritional yeast to my soup in the end.  Don’t worry….it may look like sawdust, but nutritional yeast contains B12 which is a very essential vitamin.  Plus it adds a bit of a cheesy flavor that I thought would go nice in the soup.  And it did!  I get mine at a local health food store.

  
All in all, this recipe rocks!  If you’re looking for a vegan, nutritious cream of broccoli soup….take it from me…..this STICKS!!!


******************************************************************************


2015/04/img_17752.png

Got beef?  Time for Beef Enchiladas!

Yesterday was a super busy day, most of which was spent watching my youngest son, aka Kid 3, play in his final football game of the season. They won in overtime and it was quite the nail biter! Kid 3’s team now goes to playoffs next weekend. Should be another busy but great weekend!

We got home late after the game, so I couldn’t have been any happier having that beef in my crock pot! We decided to make enchiladas out of the beef. It was so delicious! The shredded beef recipe is definitely sticking!!! Here’s a link to the recipe again:

Grandmabeesrecipes Easy Shredded Beef

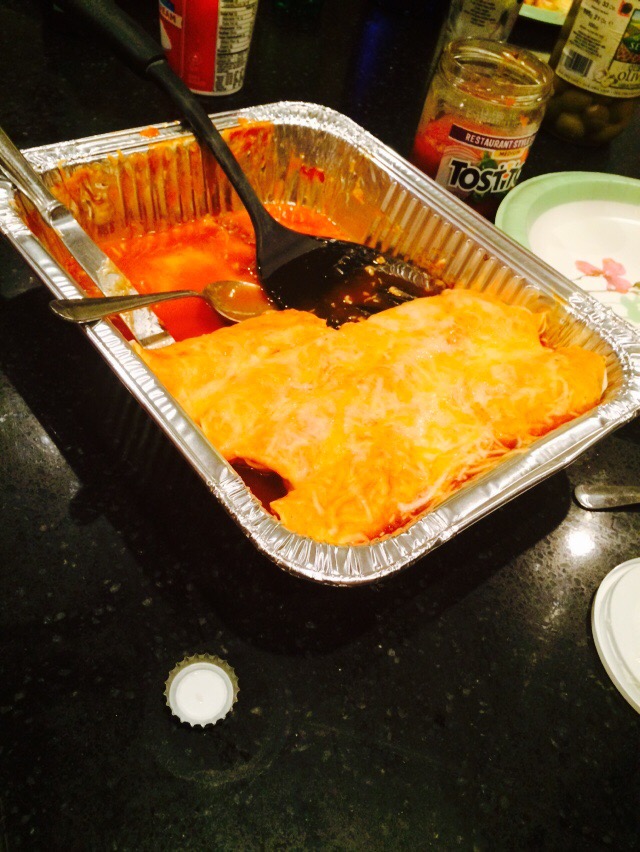
Here’s a pic of the enchiladas. It was so good I forgot to take a pic of the dish before we started eating. But at least I remembered. You’ve got to try the beef recipe! You won’t be sorry!

2015/04/img_1781.jpg

2015/04/img_17751.png

It’s all about the beef – Crockpot Shredded Beef

It’s the weekend and time to relax right?!?  Well not if you have 3 kids all with activities planned and you won’t be home all day.   So today I’m using my crock pot to get dinner ready.  Crock pots are one of the greatest inventions made to help busy Mom’s year round!!  I just love, love, love crock pot cooking!  Can you tell how much I enjoy my crock pot??? Ha! Ha!    Notice how my knob is melted?!  That’s a story for another day!  Ha!  But let me tell you, it doesn’t stop me from  using it as often as I can! So back to the beef.  Once we finally get home this afternoon, I’m banking on having some yummy shredded beef to use in either tacos or enchiladas or even a light salad.  I haven’t decided..  Ha!  Sound good?  I know! I can’t wait!  I found this yummy looking recipe on Grandmabeesrecipes.com that I had to try.  Here is the link: Crockpot Shredded Beef.   Stay tuned and I’ll let you know how it turns out!  Fingers crossed this one sticks!

***************************************************************************************

Easy Shredded Beef

2-1/2 lb. chuck roast

1 cup beef broth (I use a beef boullion cube dissolved in hot water)

1 teaspoon cumin

1 tablespoon chili powder

1/2 teaspoon garlic powder

1/2 teaspoon onion powder

1/2 teaspoon salt

1/4 teaspoon freshly ground black pepper

1/4 teaspoon dried oregano

1 small can diced green chiles

2 tablespoons lime juice

There is no need to brown the roast prior to putting it into the crock pot. Spray the crock pot with non-stick spray first. Combine the dry spices in a small dish and set aside.

Place the roast in the crock pot and pour the beef broth over top. Drizzle lime juice over the roast and sprinkle with the dry seasonings. Spoon green chiles over the roast. Cover and cook on low heat about 8 hours or until fork tender.

Drain, or spoon off most of the liquid. Use two forks to shred the beef into small chunks.

Crispy Crab Nuggets anyone?

Today I went out to lunch with my sister and we were talking about making the tagalong pound cake,  which by the way we did and was awesome!  She then told me about a crab recipe she was thinking of making for a party we are going to at a mutual friends house next month.  So I told her, let’s do the recipe together and I’ll put it in my blog.  Done!

So a little background about me.  I grew up in Maryland.  Anyone who knows Maryland, knows that we are known for our delicious blue crabs!  Everyone in Maryland loves crabs and we are always super critical of crab recipes.  In fact, we typically will not even order any kind of crab recipes at restaurants outside of the state of Maryland.

When my sis wanted to try this recipe, I was a bit skeptical at first.  But thought, let’s do it!  So here we are.

The recipe is one she saw on Facebook.  Originally, it was from a site called http://www.eddieloveshouse.com, which is now no longer active.  But another site, Essenceofprideinc.com posted the recipe last year so here’s the link: http://essenceofprideinc.com/2014/05/17/crispy-crab-nuggets/

The recipe calls for 3 slices of white bread or breadcrumbs.  We opted to use breadcrumbs.  But since we didn’t have an actual measurement, we guessed.  We ended up using about 2 cups total.  We also substituted yellow mustard in for the Dijon mustard, it’s a Maryland thing.  Just trust me.  We kept the rest of the ingredients the same.

So how’d it turn out?……….

We give it a thumbs up!  It definitely sticks!  Perfect for an appetizer and definitely to bring to a party!  Personally we love a little lemon squirted on our crab cakes, so I’d suggest that to finish them off right before serving.  We also like the cakes a bit spicier, so more Old Bay.  But that’s just our personal preference.  If you don’t prefer spicy things, never fear, this recipe tastes great as is!

Try it and let me know what you think!

************************************************************************************************

Crispy Crab Nuggets

1 pound fresh crab meat

3 slices of white bread, crust removed or packaged bread crumbs
1 egg beaten
1 tablespoon mayonnaise
1 teaspoon Dijon mustard
1 teaspoon Worcestershire sauce
1 tablespoon Old Bay Seasoning
1 tablespoon parsley

Put breadcrumbs in food processor so they are chopped up fine(to save time). In a large bowl, mix together egg, mayonnaise, mustard, Worcestershire sauce, parsley, and Old Bay seasoning. Add breadcrumbs and crab meat and mix by hand to avoid breaking up too many of the lumps. You may need to break up the very large lumps however so the crab balls will stay together. Shape into 24 balls and fry in batches in hot oil until golden brown, turning once. Drain on paper towels.

IMG_1775

Tagalong….yes please!

Today I made the Super Easy Tagalong Pound Cake recipe from Iwashyoudry.com. Totally delish and a must do if you’re looking for a quick and easy recipe to take to a party or make for a quick late night dessert.

The recipe calls for a frozen pound cake. But I just happened to have a French vanilla pound cake so I used that.  I also need to visit my local Michael’s store to get the chocolate melt-aways.  I suppose you could use a ganache or magic shell…but the melt-always are really the perfect compliment.

My daughter, aka “Kid 1” as I affectionately call her, helped out too. It was super easy and took less than 15 mins from start to finish! Yes you read that right…15 mins. I’ll wait while you pick your mouth up off the ground. *tick tock*  I know! Seriously the easiest and quickest dessert! And super yummy! Totally like eating a Reese’s peanut butter cup on top of a pound cake.

Here’s the final product!

Well minus of course a slice (or two)! I had to taste it!  😛


Definitely go do this! This one sticks for sure!!!!
2015/04/img_1775.png

2015/04/img_1774.jpg

*************************************************************************************************

Tagalong Pound Cake

Ingredients:
  • 1 (16oz) frozen pound cake, thawed
  • 2 tbsp butter
  • ½ cup creamy peanut butter
  • ⅓ cup + 2 tbsp powdered sugar
  • ½ tsp vanilla extract
  • 4oz. chocolate candy melts
Instructions:
  1. Place the pound cake on a sheet of wax paper and set aside.
  2. Combine the butter and peanut butter in a microwave safe bowl and microwave for 30 seconds, or until butter is melted. Stir until smooth and then stir in the powdered sugar and vanilla extract, stirring again until smooth.
  3. Spread half of the peanut butter mixture on top of the pound cake and place in the fridge for 3 minutes. Spread the rest of the peanut butter mixture on top of the pound cake and place back in the fridge for 3 minutes to harden.
  4. Melt the chocolates according to package instructions and then pour evenly over the top of the pound cake, letting it run down the sides. Let harden before slicing. Enjoy!

Cauliflower pizza crust…yay or nay?


I definitely give cauliflower pizza crust a big YAY!!  I absolutely adore it!  I was given the recipe, linked below, last year from a friend, and decided to give it a try.  I have tried cauliflower mashed potatoes before, so I thought, Why not?!?!.  I’m not a huge fan of cauliflower by itself, but I figured I’d give it a go.  Boy was I a happy camper!  Here’s a link to the recipe from a site called SavoryLotus.com http://www.savorylotus.com/cauliflower-crust-pizza-with-caramelized-onions-and-olives/.

Now I will admit, I adjusted the recipe to meet my husband and I’s taste.  But isn’t that what you’re supposed to do?!?  *nodding yes*  For us, I added another 1/2 cup of cheese. What can I say?!  I LOVE cheese!!!  I also kept my seasoning pretty basic…salt, pepper and garlic powder.  I have tried it with oregano and it was fine…could barely taste it.  So figured I’d just leave it out.

Before:   

During:


After:

As for the pizza…well you can mix and match your ingredients any way you’d like.  Don’t like Carmelized onions?  Swap it for pepperoni!  Olives make your stomach churn?  Substitute sausage.  Make this however you’d like.  The point is that the basic recipe for the crust is the bomb!   The pics above of us making a mushroom pizza.  And man was it good!
Oh and by the way, this is definitely something to keep in your freezer for later!  I try to keep 2 crusts in my freezer at all times!  I’ll cut these up and make them into pizza sticks.  You can make smaller ones for a pizza for one.  Or even make smaller as “tortillas” for an enchilada bake.  Oh yes, that’s happening.  Stay tuned for that recipe!

This recipe definitely sticks!  Try it and let me know what you think!

***************************************************************************************************

Cauliflower Crust Pizza

Ingredients

  • 1 large head of cauliflower (cut into florets, stems removed)
  • 1½ cups mozzarella (or other hard cheese), grated OR 4 oz. soft goat cherve
  • 2 eggs
  • 1 tsp oregano, dried
  • 1 tsp garlic powder, dried
  • ½ tsp celtic sea salt
  • For Pizza Topping:
  • ¾ cup pizza sauce
  • AND TOPPINGS OF CHOICE
Directions
  1. Preheat oven to 400′ F
  2. Process florets, in batches, in food processor until resembles consistency of rice
  3. Place 4 cups of cauliflower “rice” into medium pot. Sprinkle with a pinch of salt and 2 TBS water. Cover and steam on medium heat for 6-7 minutes, until soft but not mushy. Stir occasionally
  4. Place a clean dish towel over a large bowl and carefully dump cooked cauliflower onto towel. Allow to cool for 10 minutes
  5. Gather up the ends of the dish towel, wrapping the cauliflower mixture inside and gently squeeze out ALL of the water into the bowl (Try to get it all out. This prevents soggy crust. Trust me!!)
  6. Combine squeezed out cauliflower with remaining ingredients and mix thoroughly
  7. Using your hands, spread the ‘dough’ into a thin layer on a cookie sheet covered with parchment paper
  8. Bake for 35-40 minutes at 400′ F until uniformly brown
  9. Allow to cool
  10. Spread pizza sauce onto crust. Add your toppings
  11. Bake for 10 minutes at 400′ F

Who doesn’t love dessert????

So I’ve been trying to eat healthy lately, but it’s really not working.  Let’s face it….sometimes you have the determination to be on point and sometimes you don’t.  Lately, I’ve been the latter.  Every time I login to Facebook or Pinterest, I see a ton of recipes that just make it too hard to eat healthy.  Most of the time I give in.  But today, I’ve decided that I’m going to try making some of these delicious concoctions.  First up, this delicious find that I saw on Facebook.  It’s from a blog called Iwashyoudry.com.

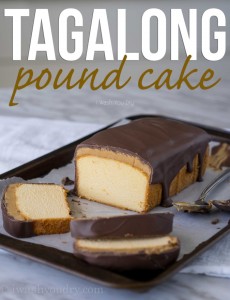
Tagalong-Pound-Cake-4-copy-675x877

Yes, doesn’t that just look yummy!  It spoke to my heart….seriously.  I mean I couldn’t resist.  And bonus, it looks even easier to put together.  Oh and not to steer you off course here, but she also has a recipe for a Thin Mint pound cake.  I think this lady is on to something!  Here is a link to the recipe: http://www.iwashyoudry.com/2015/03/09/super-easy-tagalong-pound-cake/.

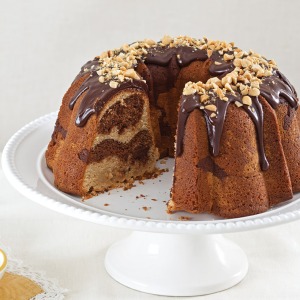
So for comparison sake, I looked to see if I could find any other dessert recipes similar to this one.  And I did.  Sorta.  It is on a great site called AllAmericanCooking.com.  It is a pound cake but made into a bundt cake and has yummy chocolate and peanut butter swirled all throughout.  Yeah how can that be bad?!?!?!  It is also completely homemade and looks like it’d take a bit more effort.  But certainly, anything that’s gonna be delicious is worth a little effort.  😉  So without any further adeau, I give you AllAmericanCooking’s Chocolate Peanut Butter Pound Cake.

chocpbbundt

Here’s a link to the recipe: http://www.allamericancooking.com/chocolate-peanut-butter-pound-cake-recipe/.

So now that I’ve got you salivating, time to get baking!  I’ll be making the Super Easy one first to see how I like it.  The bundt cake I’ll save for another date and time when I’m feeling a bit more adventureous!   Again, if you’re up to the task, please make the second and let me know how you like it!

I’m really hoping this recipe sticks…because easy and dessert are irresistable to me!